How to Paint Miniatures with Acrylic Paint
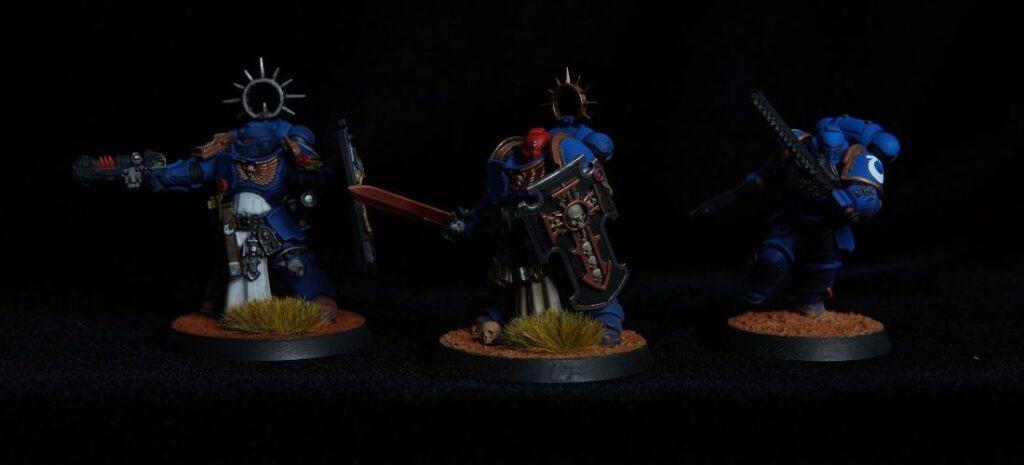
Some links on this page are affiliate links. I only link to things I'd actually recommend.
Acrylic paint is the best starting point for miniature painting. It dries fast, cleans up with water, and forgives mistakes in a way that oil or enamel paint simply doesn't. If you've never painted a miniature before — or if you painted one years ago and want to start again — this guide walks you through every stage from the raw sprue to a finished model.
You don't need an airbrush. You don't need expensive brushes. You need a handful of basic supplies, a little patience, and a method that actually makes sense for beginners. That's what this guide is.
Here's the order we'll follow:
- 1. Assembly
- 2. Cleaning
- 3. Priming
- 4. Base coat
- 5. Shading
- 6. Highlighting
- 7. Finishing
Work through each step in order. Skipping steps — especially priming — is the single most common beginner mistake, and we'll cover why.
What You Need Before You Start
Paint:
Any hobby-grade acrylic (Citadel, Vallejo, Army Painter). Avoid thick craft store acrylics.
Brushes:
A size 1 or 2 for base coats and a size 0 or 000 for fine work.
Primer:
Spray can or brush-on acrylic primer made specifically for miniatures.
A Palette:
A ceramic tile, glass, or stay-wet palette. Never paint straight from the pot.
Water:
Two cups: one for rinsing, one clean for thinning paint.
Handle:
A handle, wine cork, or dowel to avoid touching the model while painting.
Step 1: Assemble the Miniature First
Assemble the miniature before you paint it. This ensures transitions flow naturally and you won't have visible seam lines.
Glue: Use plastic cement (like Tamiya Thin Cement) for plastic kits to create a chemical bond. Use superglue gel for metal or resin.
Mold lines: Scrape off raised manufacturing lines with a hobby knife before assembly.
Gaps: Fill small gaps with superglue or green stuff (epoxy putty) and sand smooth.
Step 2: Clean the Model Before Priming
Plastic models need a quick rinse in lukewarm water with dish soap to remove mold release agents.
Metal and resin miniatures need more attention: scrub gently with an old toothbrush in soapy water. If water beads on the surface, it isn't clean enough. Any leftover oils will cause primer to flake or bead.
Step 3: Prime the Model — Don't Skip This
Priming gives the paint a surface it can grip. Acrylic paint does not bond well to bare plastic or metal.
Spray can primer is fast; hold the can 12 inches away and use short passes. Brush-on primer is great for indoor use without ventilation.
How long for primer to dry? Spray primer is touch-dry in 15–30 minutes, but wait 1–2 hours before painting. Brush-on primer is safe to paint over in 30–60 minutes.
Step 4: Apply the Base Coat
The base coat is your foundation. Thin your paint with water until it has the consistency of skim milk.
Apply multiple thin coats rather than one thick one; this preserves detail. Work through the model systematically, one color at a time (skin, then armor, then cloth).
Step 5: Shade the Model to Add Depth
Shading makes a flat base coat look three-dimensional. A shade wash (like Citadel Agrax Earthshade or Nuln Oil) flows into recesses automatically, creating shadows.
Apply the wash freely over surfaces or into specific joints. If it pools too much on flat areas, wick it away with a dry brush. Let it dry for at least 30–60 minutes.
Step 6: Highlight to Bring Out the Detail
Highlighting creates the impression of light. Use a slightly lighter version of your base color on the raised edges that would catch real sunlight.
Edge highlighting: Draw a detail brush along raised rims.
Drybrushing: For textured surfaces like fur or chainmail, wipe almost all paint off a flat brush and flick it over the surface.
Step 7: Finish the Base and Seal the Model
Ground your model by painting the base a neutral color, applying PVA glue and sand, then drybrushing it.
Finally, apply a varnish (matte or satin) to protect the paint from chipping. Apply in thin coats in a dry environment.
How to Do This Without Any Special Gear
DIY Wet Palette
Use a ceramic tile or a damp paper towel under baking parchment in a flat container. Save money on professional tools.
Improvised Handle
Tape the base to a wine cork, wooden dowel, or thread spool. Steady your hand and protect the surface.
Substitute Washes
Thin down your darkest color with water and a tiny drop of dish soap to break tension. Create depth with basic paint.
Custom Highlights
Mix a small amount of white or ivory into your base color to create a lighter tone. No need for extra paints.
Common Problems and Fixes
Paint is too thick — lumpy, hiding detail
Thin your paint on the palette. If dry, you may need to strip the model or accept the layer and thin everything going forward.
Visible brushstroke marks
Two causes: paint too thick, or brush too dry. Use a fuller load on the brush so the paint flows rather than drags.
Uneven primer adhesion
The surface wasn't clean. Strip what you can, wash the model again, dry it completely, and re-prime.
Tide marks from washes
The wash pooled on a flat surface. Fix by re-applying the base coat lightly over the flat area once the wash is dry.
If You Want to Go Further
The Miniature Painting Level Up Guide is a 60+ page eBook built for painters who've finished their first model and want to master blending, non-metallic metal, and lighting effects.
No padding, just techniques.
Common Questions
Hobby-grade (Citadel, Vallejo) is best as it's formulated for small surfaces. Craft paints work but need aggressive thinning.
1–2 hours for spray cans, 30–60 minutes for brush-on. If it feels tacky, keep waiting.
Yes. Paint from the pot is too thick for miniature detail. Thin it to the consistency of milk.
Yes. Let the mistake dry completely, then apply a thinned layer of the correct color.
They are the same thing—thin, flow-enhancing paint used to settle into recesses.
Yes, but use spray primers and varnishes in well-ventilated areas or outdoors.